تبادل لینک هوشمند برای تبادل لینک ابتدا ما را با عنوان فروش اقساطی لوازم دیجیتال با ظرفیت محدود و آدرس saftpars.ir لینک نمایید سپس مشخصات لینک خود را در زیر نوشته . در صورت وجود لینک ما در سایت شما لینکتان به طور خودکار در سایت ما قرار میگیرد.
You can install the PPPoE client just like you install any other dial-up networking connection. To create a PPPoE client connection, follow these steps:
Click Start, click Control Panel, and then double-click Network and Internet Connections.
Click Network Connections, and then click Create a new connection in the Network Tasks pane.
After the Network Connection Wizard starts, click Next.
Click Connect to the Internet, and then click Next.
Click Set up my connection manually, and then click Next.
Click either Connect using a broadband connection that requires a user name and password or Connect using a broadband connection that is always on.
Type the Internet service provider (ISP) name that your ISP provided, and then click Next.
Type the user name that the ISP provided.
Type the password that the ISP provided.
Type the password one more time to confirm it, and then click Next.
Click Add a shortcut to this connection to my desktop.
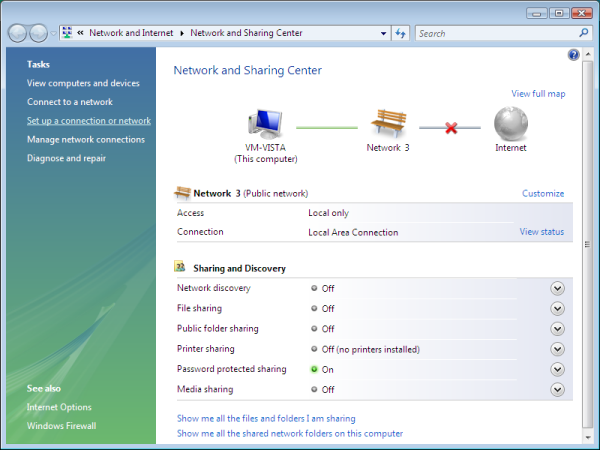
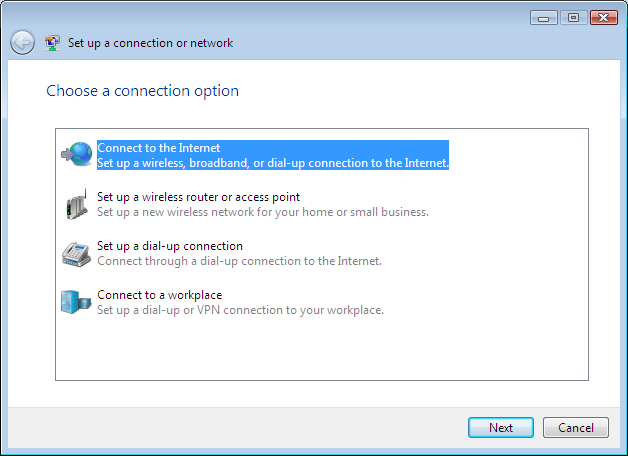
To create a PPPoE connection in Vista, click the Windows button (this replaced the Start button), and click on Control Panel. In the screen that comes up, click on View Network Status and Tasks. Click on Set up a connection or network.
Highlight Connect to the Internet, and click Next.
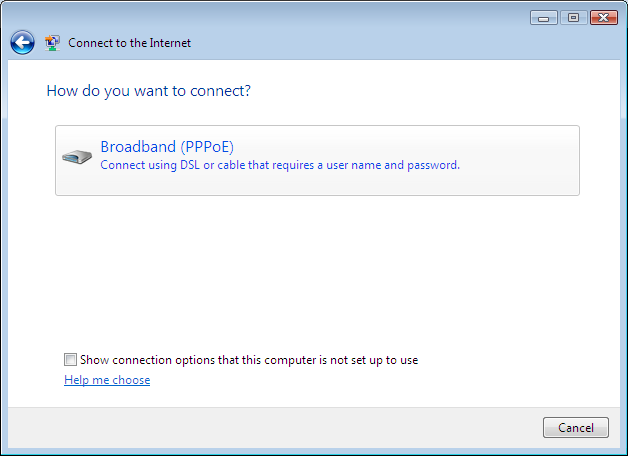
Click Broadband (PPPoE).
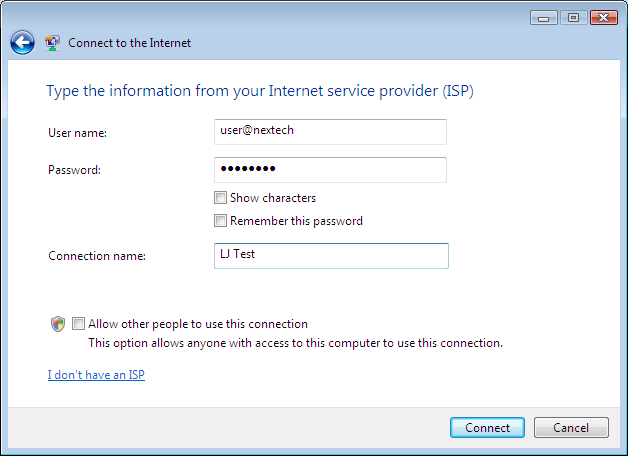
Type in the Username, Password, and Connection name, and click on Connect.
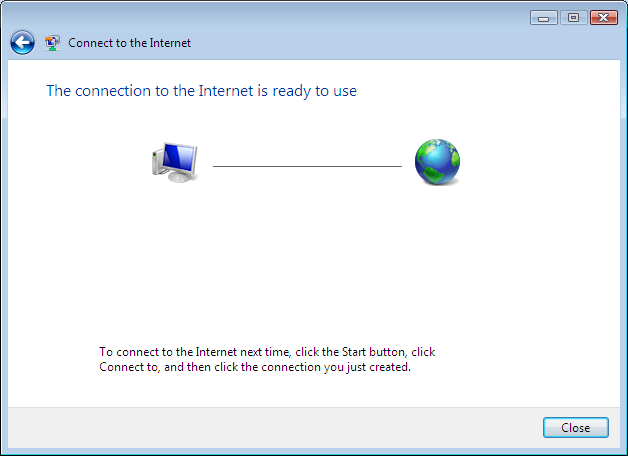
The computer will try to connect, and if successful, you will see the following screen. Click Close.